The Flymaster LIVE SD is a top-of-the-range flight instrument offering advanced competition features and live tracking. Flybubble team pilot Phil Clark checks out the features and offers advice on getting the most out of this great unit.
Intro: Flymaster SD range
Flymaster's "SD" range (with names ending "SD" or "SD+") covers the usual all-in-one functionality we've come to expect from alti-vario-GPS devices in that they tell you where you are, how fast your position is changing and in which direction.
Only the entry level VARIO SD is without the logging and navigational functions that you get with a GPS element on board.
Further up the range are some rather useful extra functions for navigation and tracking.
The basic GPS SD model will log your flights, navigate you through a route and around airspace but if your route has time attached, like a start cylinder or a speed section, then you'll appreciate the NAV SD.
The GPS SD+ gives the added safety of broadcasting your position in real time via the mobile data network.
The NAV SD makes it easier to deal with competition tasks, speed sections and suchlike.
The LIVE SD combines the extras from the XC focused GPS SD+ and the competition focused NAV SD into the one device.
Flymaster LIVEtracking
Flymaster LIVEtracking is a free tracking service for Flymaster's flight instruments. It was developed and used for the X-alps and currently the LIVE (the forerunner to LIVE SD) is supplied to Paragliding World Cup (PWC) pilots during tasks to enable the live broadcast of pilots' positions during tasks. Further, it helps eliminate task setting errors and makes it easier to report weather / safety conditions on task.
Flymaster LIVE to LIVE SD
I've been using Flymaster's LIVE since it first became available and was curious to see what was new from this latest edition. Flymaster promise a better compass and more storage via an SD card facility. They also say that the new screen is 'virtually indestructible'.
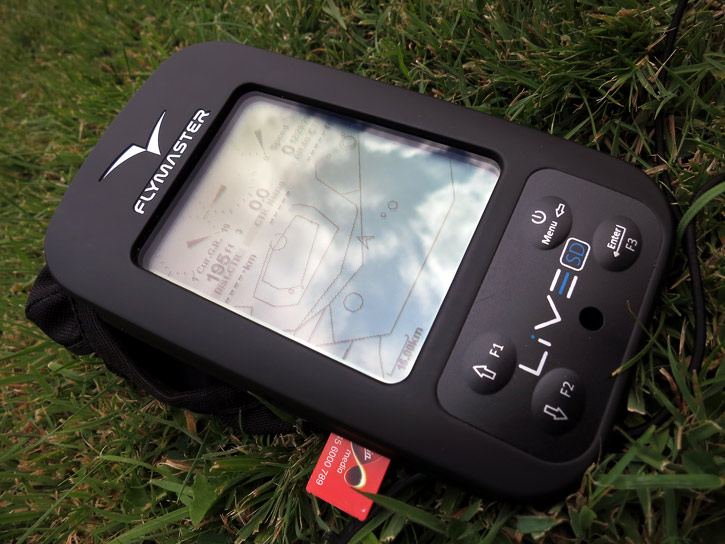
So what's in the box?
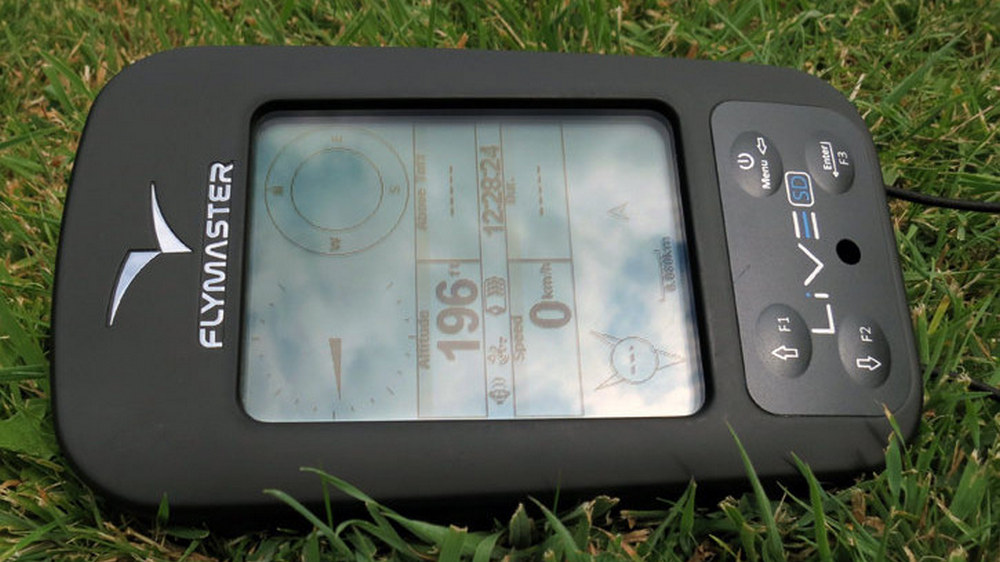
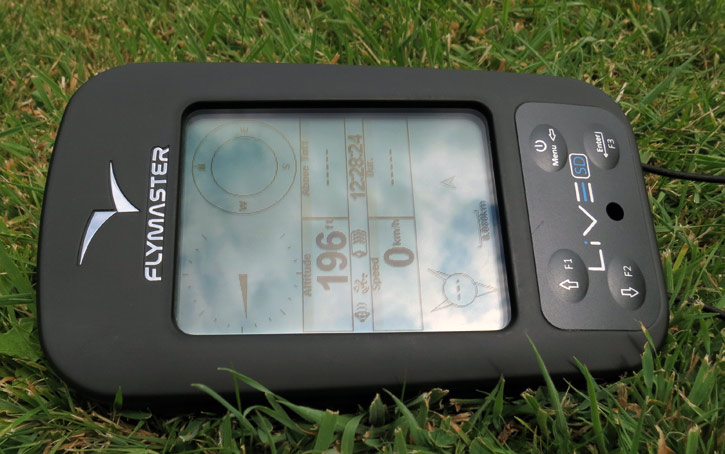
The version I was sent came with a charger, UK power socket adapter for the charger, a USB cable, firm shell case and the unit itself. No SD or SIM cards were included and there was no quick start up guide or any other document. It was well packed and had a substantial film tacked over the screen but still there was a slight scuff to the top of the case. When powered up the unit said the battery was at 97% charge, the unit said that was good enough for more than 35 hours flight.
Screen layouts & Flymaster Designer
The LIVE SD shipped with 3 page designs preloaded into it. A big feature of these instruments is the ability to completely customise the way the screen is laid out and how the unit deals with airspace warnings, hitting the turn-points and discovering thermals. Key to getting the most out of these devices is in getting used to the Flymaster Designer software application and sorting out exactly what you want.
It is possible to design and store in the unit up to 16 different pages with any combination of fixed or variable data field and a variety of elements for the vario, compass and other gauges.
First hurdle: screen layouts
Therein lies the first of the hurdles, trying to figure out what you want, what you need and how to get that into a neat and tidy display. Both the default layout that the unit comes with and a competition layout are available for download from the web.
I'm not the most technically minded of people* and I really struggle with all things computer when they don't work as I think they should. All the nonsense of files and formats and drivers and protocols drives me scatty until I get it working. Once it's up & running I can easily modify things to suit and for the last year or so I've been really happy with my LIVE. That first year though I cursed it rotten because it didn't work in the way that I thought that it would.
*Ed: We'd say Phil is actually more technically minded than average. Flymaster instruments are not the simplest to use and take more getting used to than some other instruments. So expect some time referring to the manual and learning how it all works.
Screen layout customisation tips
The biggest tip I would give anyone purchasing one of these is to take your laptop to the hill for the first couple of times you go flying. That way you can fly, check your layout, land, edit, and test again on the same day. I had to develop my first layouts by coming home to the PC and waiting two to three weeks before I could get out again, only to find out it still wasn't quite right.
The other big hot-tip is the F5 key when you're sorting and adjusting your layouts, it instantly transfers what you've done to the device so you can tweak and nudge the box sizes to perfection. This is useful because the text and fonts do look a little different on the PC screen when compared to the unit itself and sometimes you end up dragging a box across your layout by accident as the clumsy thumbs strike once more.
It's also high recommended to have the default layout saved as a back up on your PC, so you can easily go back to what you know if/when you make a mess of editing your own layout!
This is where the Naviter Oudie range score an advantage, by being easier to set up on the hoof.
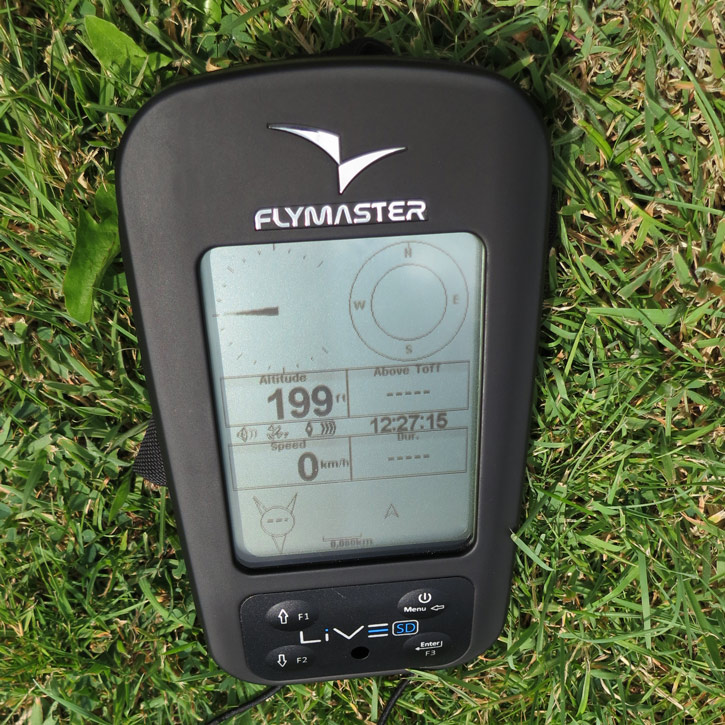
That said, the first page of the LIVE SD's default layout came with 6 user-defined fields at the bottom of the screen. These can be changed without connecting to the PC so any one of nearly 80 different parameters can be displayed in these six boxes.
Those default layouts will certainly see you through a few flights before you figure out what you really want.
Flymaster Designer teething troubles
So loading up Flymaster Designer then to transfer my trusted layout and airspace files into the new device and it turns out I need a new version of the Flymaster Designer software which wasn't initially available at the time of writing. This serves to highlight my only other gripe, that things are almost there but not quite ready for the day of release. But then a few swapped messages later and it turns out that what I needed was available but that I was looking in the wrong place on the internet. It's things like this that I was frustrated by because it's so easily fixed with a small piece of paper in the box.
Once I'd finally sorted the software issue it turns out that the new unit communicates much quicker than the old one with my 'reasonably' specified Windows 8.1 PC.
Airspaces
When the LIVE first came out I had problems with the airspace, Military Aerodrome Traffic Zone (MATZ) stubs in particular, and it took a few firmware updates before it would draw correctly. Then it took a few more updates before more than 100km square of UK airspace would fit into the device. Whilst these things gets sorted eventually but it would have been better if they'd been taken care of before the unit came out. Or perhaps I'd like to known, ahead of time, if I was going to be a beta tester or buying a finished product.
Firmware development
With the LIVE SD there has been a lot of development in the firmware already for the LIVE and a lot of testing was done through last year's PWC circuit so what's in the unit is pretty robust. That also goes for the unit itself, I didn't fancy trying to break it but it certainly looks like it could take more of a pounding than the popular eBook alternative. This is the other big advantage for the dedicated device is that it's all in one piece with no extra battery packs, loose leads, extra lumps or soldered bits. I've seen some home built solutions that look very professionally put together but still they seem fragile and some of the solutions whilst looking great in theory don't hold up when it comes to the crunch, both in the general use and accidental abuse terms.
Battery life & charging
Thirty plus hours of battery life on a full charge is pretty good too and whilst the unit is best charged by mains power the long life means there's no real need to charge if you're away for a week and that's another score over the phone solutions.
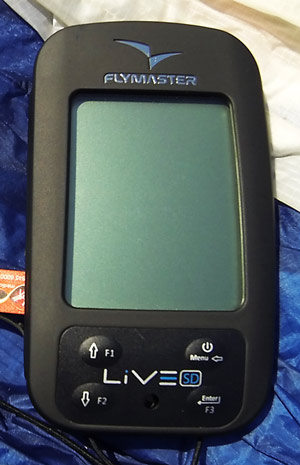
Case & lanyard
The case have rubber socket seals down the side to prevent dust and dirt getting in and the only thing attached to the LIVE SD is a lanyard (a loop of bungee cord secured at the bottom of the case) to lash the device to your harness or flight deck.
Mounting
To mount the device on your harness or flight deck it will either need some hook and loop fastener strips stuck on the back of the case or—better—be slipped into the Flymaster Pocket and used with the mount of your choice) before flight.
For flight testing I just slipped the new unit straight in to the space in my Flymaster Pocket vacated by the old LIVE.
Improvements: screen
All the things I loved about the LIVE are still there and the new screen is slightly easier to see at an angle than before. The aperture in the case for the screen is a little larger, by a few mm each side, and the screen itself isn't quite as recessed as the previous model so that helps too. I guess by being tougher the new screen doesn't need to be quite so protected by the hard, slightly rubbery casing. There is also less ghosting and tinge to the screen too, it's more of a flat silver background and there's less of the greenish tinge and stripes that affected some of the layouts on the older model. I'd never noticed it before but once you see the old one up against the new the differences are subtle but clearly there.
Improvements: compass
I rarely rely on the compass in flight but it is noticeably less laggy than the previous model.
Improvements: SD card
The extra capacity on the SD card means that, unlike the previous model, there's no worries about switching airspace files when you travel. (On the old model the entire UK took up just under 60% of the capacity, it's the same on the new version without inserting an SD card.)
Firmware, maps & airspaces
The firmware will undoubtedly improve and there is talk of receiving flight data from other nearby users for display on the maps and also some sort of terrain database is promised for down the line too. That may be more like a series of reference points rather than a greyscale terrain map. At the time of writing it's not clear exactly what is planned but certainly with the SD card in situ memory space is not the issue it had once been with the LIVE.
Summary
As the adage goes, you get what you pay for and so it does makes it frustrating with the minor quibbles, but once the quibbles are resolved (and they were within a day or two) it becomes an amazing bit of kit that does all I need and more than I'll ever want.
The LIVE would have scored 6 out of 10 on release rising to an 8 out of 10 once I'd figured it out. The new LIVE SD gets a solid 9 out of 10, as it's just not quite perfectly finished. They really need to have some printed quick start instructions in the box for the new user. A wider range of design inspiration on the web would be appreciated.
In summary, the LIVE SD is a definite step up from the old LIVE model, it simply does everything faster, it's a clearer screen that's easier to see, it's a quicker compass, no more storage issues.
Find out more about the Flymaster LIVE SD
Flymaster LIVE SD: Tips
Flybubble Team Pilot PHIL CLARK considers what you can do with the LIVE SD and how to get the most out of it.
Altimeter
You can choose to use a barometric altimeter or a GPS altimeter: the barometric relies on setting a reference pressure at varying levels for QNH, QFE or the flight levels and such. It is possible to set up a 2nd altimeter and zero this with a one button press. If you could do this at the top of a climb, or cloud base and then the next time you max out your climb you can see how the day has improved or not.
The GPS altimeter works well if you have a reasonable signal. Some argue this is better for glide to goal, since the altitude of the turnpoint is known and the GPS altitude will not be affected by changing air pressure (unlike the barometric altitude, which might cause you to land short).
Vario
The three aspects to consider here are the audio, the visual gauge and the numerical value. The audio is completely customisable but I use the default settings only adjusting the sink threshold to make the unit very rarely silent. The 'not enough lift' buzzer can be disabled but I find I rarely hear it in flight and once landed you 'report back' to silence the unit.
The growling buzzer sounds in very slight sink, meaning you are in rising air but that the air is not rising enough to overcome your sink rate and allow you to maintain or climb. Personally I find this hugely useful on the weak days or maximising height soaring above a ridge. The other settings define how the rate and pitch of beeps changes with climb rate, useful if you fly in strong or weak areas.
There are three visual elements to choose from that are dedicated as vario gauges as well as the definable 'rev counter'. This element can be used for speed, glide or one of the 15 other parameters but I use the instantaneous 'Vario' function. The max and min can be set on the rev counter so for weak days I use +/- 3 m/s for the range but in strong conditions I use +/- 6m/s whereas the traditional three alternatives are fixed at +/- 10m/s.
The numerical value is available as instantaneous or average, whatever you set as an average for the vario will be applied to the other averaged values for ground speed and rate of turn.
GPS logger
The unit automatically records the time, your altitude and your position at regular intervals. The flight computer uses the changes to give you glide angle, ground speed, heading / bearing and can then approximate wind speed and direction as well as providing values for speed and glide in relation to waypoints. The free program GPSdump is used to extract the flight log, create the IGC file for XC leagues and to manage waypoints.
Navigation
The designer software is used to load airspace information which must be in the OpenAir format but once this is loaded the unit can also be configured to give proximity warnings for violations. The Openair format is relatively simple so it is straightfoward to make a test airspace to sit at one end of your local ridge. Use this test airspace to refine your settings and learn how the unit behaves and responds before you find yourself in the midst of an XC flight and wondering what the racket is about.
I made micro-triangle waypoint courses before I went to my first comp so I could learn how the navigation arrows work in flight on my local sites. When I got back I did a similar thing with airspace and refined my settings.
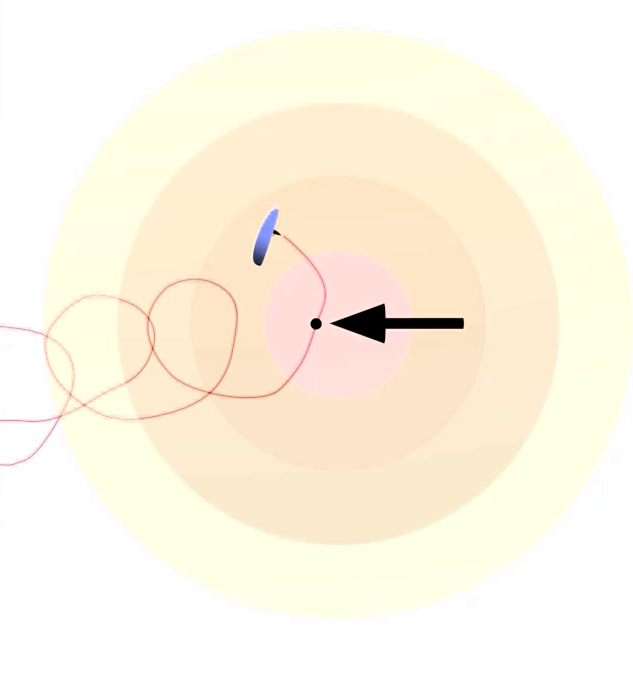
LIVE tracking
The mobile data network is accessed by the insertion of a SIM card. I use a pay-as-you-go card with a data bundle on the top up. It's a regular sized SIM card and is best installed with the aid of a small flat tool to push completely into position. I didn't want to change the card every time I fly so that's why I got the dedicated SIM. You can also text messages to a dedicated number too. This can be a regular broadcast of your position fix plus groundspeed or you can 'report back' levels of condition or the need (or not) of retrieve or assistance.
![]()
& then more
The unit can be connected to additional external devices for monitoring True Air Speed via a pitot probe, heart rate via a chest band or engine performance. The TAS probe also opens up the door to MacReady functions and speed to fly. It also provides air temperature information, whilst the heart monitor can additionally provide acceleration and pedometer data.
Designer Software
This really is the key to getting the most from your unit, as shipped I find the default layouts have too much information for me. I mostly fly by feel and use the instrument to confirm my suspicions about climbing, groundspeed or bearing and such. I mostly use a very pared down display for general flying and only use the extended functions when flying competition tasks or XCs.
There are 80 different information boxes (data fields) that can be displayed and using a UDF box or two in your layout can help you decide if the info is useful or not without having to drag back to the PC to make changes.
The downside is that there isn't really a one layout, fits all, general purpose design and it needs connecting to the PC to make changes. If you can take your laptop to the hill that will enable you fly and adjust and fly and adjust and make a bunch of developmental steps quite quickly. The alternative is to collar someone whose layout you like and ask them for a copy!
There are a few who lack the patience that this process requires and this unit isn't for them. Whilst it's not difficult to design and develop layouts and generally get to grips with the instrument it can be immensely frustrating. Most of the problems I have had with this unit and its predecessor are due to the thing positioned directly between the seat and the computer's keyboard when I'm at my desk.
Regarding use in flight the display is noticeably improved over the old model and much clearer than any of the colour LCD displays. Only the paper white displays are easier to see in direct sunlight but I find the refresh rate and ghosting to be an issue when all you have time for in flight is just the quickest of peripheral glances at the display.
I realise this is a very subjective view point and in the same way people want different things from their wing or harness so they will demand different things from their instrument. The Flymaster units work for me and I freely admit I am a bit of a fan.
Find out more about the Flymaster LIVE SD
Flymaster LIVE SD: Screen design
If you're like me you'll want to make it your own layouts. Rather than re-write the manuals, here are some bits that might help supplement the manuals. If you're struggling to design useful screens, then keep in mind that in the air...
* you only want to confirm what you suspect
* you have less than a second to assimilate the info
* you're supposed to be flying
* labels are useful
So we need to consider what you actually want to know when you're flying, what type of flight you mostly do and what you might want to know when you're on the ground. We also need to think how you want to divvy up the screen and how many screens you actually need. Think about how your instrument sits in your harness or flight deck, is it easier to see things at the top or the bottom of the display?
Some of the other points to consider:
* which fields do you want to display? there are 80 to choose from and you want altitude right? but QFE? QNH? Flight level? do you need them all?
* vario? which type? do you need a number? average or instant?
* speed? average or instant? what about glide ratio?
* any distance? to or from anything?
* will you switch pages in flight?
These sort of things can help refine your layouts and ideas, look in the manual for the list of fields and see if there are there any you don't understand then have a crack at putting a page together.
Basics to help you put a screen together:
* the screen is 240 wide by 320 tall
* so 2x boxes side by side need to be 120 wide and need 'x' values of 0 and 120
* 3x boxes must 80 wide and need 'x' values of 0, 80 and 160
* heights depend on font size and whether you have a label or not, so a large font with a label needs a box height of 50 if the units are to the right or absent
* do you need a box or not?
* do you need units or not?
* some things are fixed and you cannot change their size
One of the best things to do in getting the most out of Designer is to make your pages with your instrument plugged in and powered up. Every time you make a change or add a new box you can press F5 to send it to the device and see how it looks. What appears on the computer and how it looks on the device are two different things.
Changing the font size is done in the set-up of your design, double click on the box you wish to edit, click the 'data field' tab and then the drop down arrow to select Large, Normal or Tiny. Now have a look at font sizes and work out whether tiny, normal or large are most useful for you, whether you want labels for things or not. Look at it on the device not your computer screen.
Now look to see how easy it is to visually check a small value (less than 100ft /min or 0.5 m/s) climb or sink rate with the various vario types. The three dedicated Vario elements have fixed values to the range they display. In my view +/- 10 m/s is too large so I use the rev counter dial. I have 2x similar pages but on one the range is +/- 3 m/s the other is +/- 6 m/s. If the climb is stronger than +6m/s I'm really not looking at the vario!!!
You can play with the dials and alter them to be centred left, right, up or down and I use dials for glide ratio and speed too. The range on my glide dial goes from 1 to 19 so that 10 is vertically upright in the centre, my speed dial is set so that trim speed is upright in the centre too so if both needles point straight up I am in still air.
If you make a mess of things then click once (with the left button of the mouse) on the offending element and press delete - repeat until page is clear or less messed up - a double click brings up the properties box to edit the element. You can also nudge a box around with the arrow keys.
If you make a box into one of the 'UDF' ones then you can set it to display any one of the 80 fields without connecting to the PC to make the change. If you're unsure if you want instant or average vario for example then set that box to be UDF1. Now, on your device go into the menu, down to Data Fields and there you can select which one of the 80 available values is displayed in the UDF1 area of your page. I used this to figure out whether I wanted instant or average values for climb and speed and also for figuring out which distances to turnpoints, edges and lines I needed.
Once I knew what I wanted I finalised my layout and took the UDF's out of my layout leaving the chosen fields in their place. Now I only use one of the UDF fields, that is when I change my XC page into my Comp page. I could have both pages on my device but I don't want too many pages set up at any one time as I manually switch between the pages in flight.
So let's have a look at 3 pages I've designed, the first is one I did for a friend.
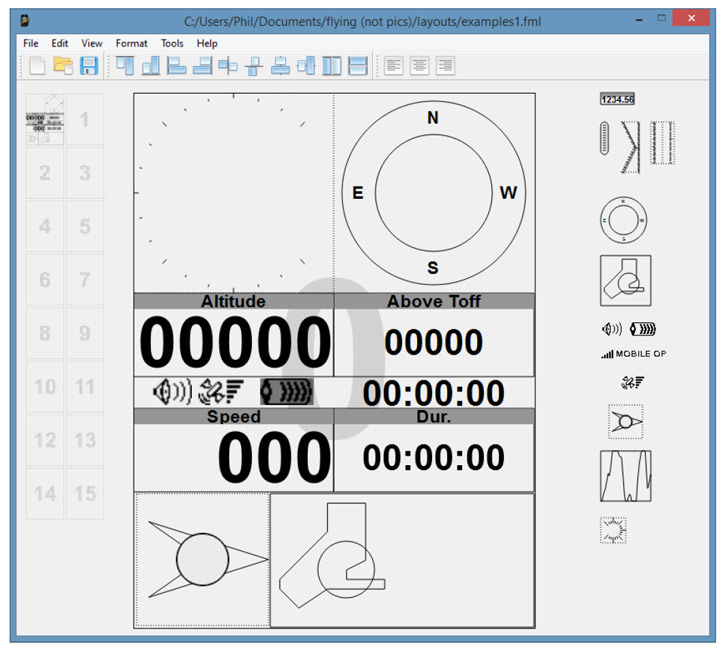
Download this layout example here (right click, save link as).
The boxes are self explanatory since they are labelled, Time is in the middle above duration. I used Normal fonts for the times to make them fit the space. I also used a 'Normal' font for the altitude Above Toff so the 'Large' font of Altitude (above sea level) would catch the eye more quickly.
The instant vario range is set to +/- 3 and whilst there is no number displayed you could easily make it more or less sensitive by choosing m/s or 100ft/min as your unit in the device's settings. You could still do this with the number but I find that more confusing.... ie what does 2.5 mean today? With just the dial affected means it's a more twitchy needle and it's easier to figure which one you set if you forgot. For mountain flying you might refer +/- 6 or even +/- 9. I tend to use multiples of 3 because that's how the dial is divided.
Climb and direction are at the top, the arrow in the nav wheel would point back to take off with no route set. Wind speed and direction are at the bottom left and a task map is at the bottom right. Where the unit is positioned in my harness the lower portion of the screen takes more of a deliberate effort to read so that part of the screen tends to have bigger boxes or less vital info. Originally the task map was a trend box but I like the snail trail you get on the task map.
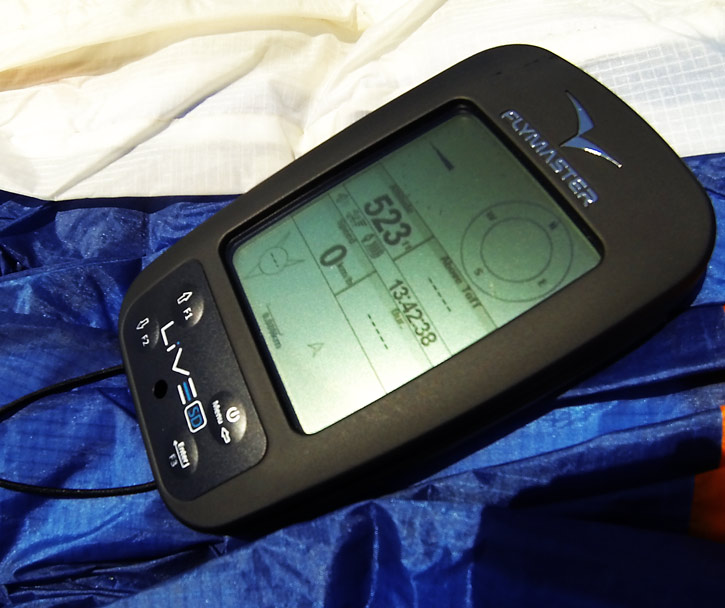
Here's the page I use near airspace
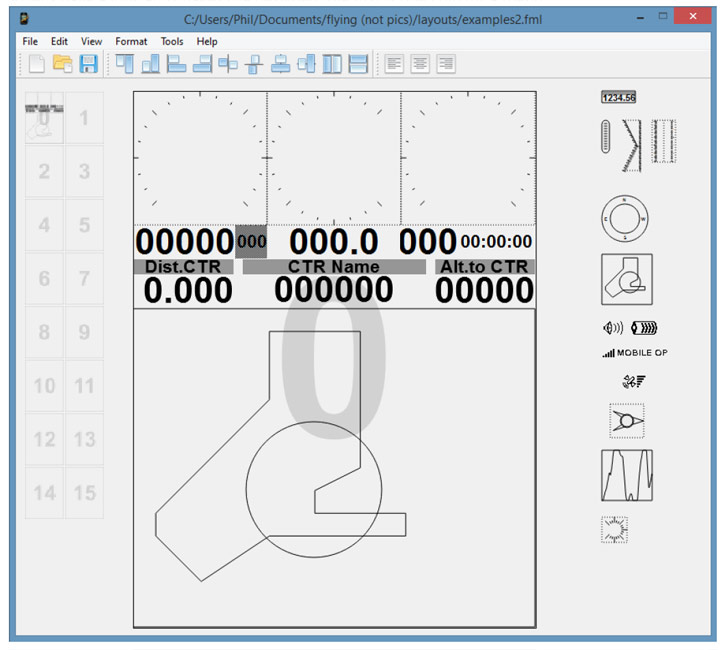
Download this layout example here (right click, save link as).
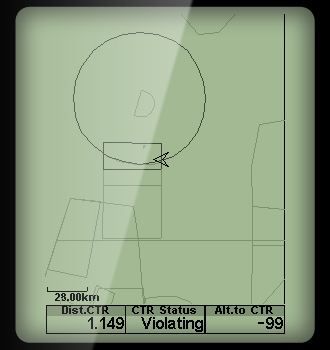
I manually switch to this page when the airspace alarm goes off, a few sites I fly at have radio masts at one end of the ridge and if I left the automatic trigger on it would always be switching. I could edit the radio masts out of the airspace file I use but I like having the landmark give the sense of scale.
Most of the prominence is given over to the map and I tend to use this in flight with either a 2km or 800m scale. Dist and Alt are labelled and so is CTR Name. If you get an alarm and don't know why then 'CTR Name' displays the AN detail from the openair.txt airspace file that you have loaded in. That way you know to pay more attention to the ATZ below you or the Flight Level above you.
The values above the CTR line (without labels) are Altitude, Flight Level (in tiny font), Ave Climb, Ave Speed and time (since I always need to know the time). The dials above that show Glide Ratio, Instant Climb and Instant Speed. I don't use labels as it's clear what they are from their values.
If the alarm goes off when climbing I leave the core, switch to this page and avoid an airspace violation at all costs. Only when I have my route clear do I switch back to my task / xc page.
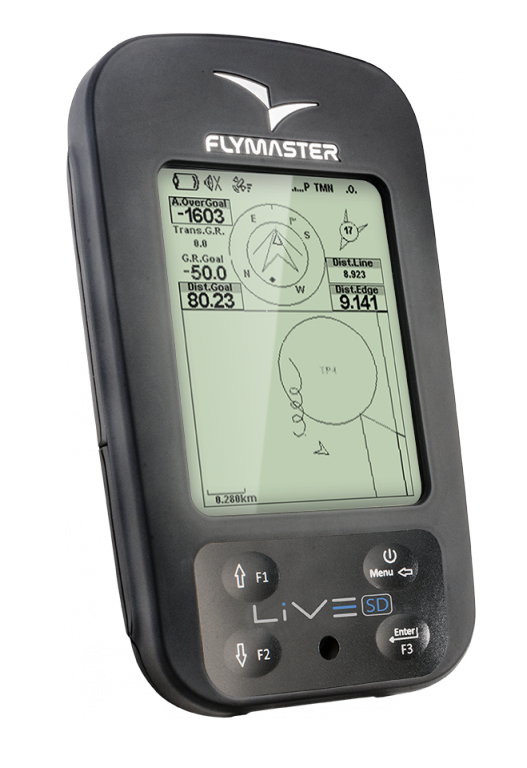
Here's the page I use for tasks and general XC flying
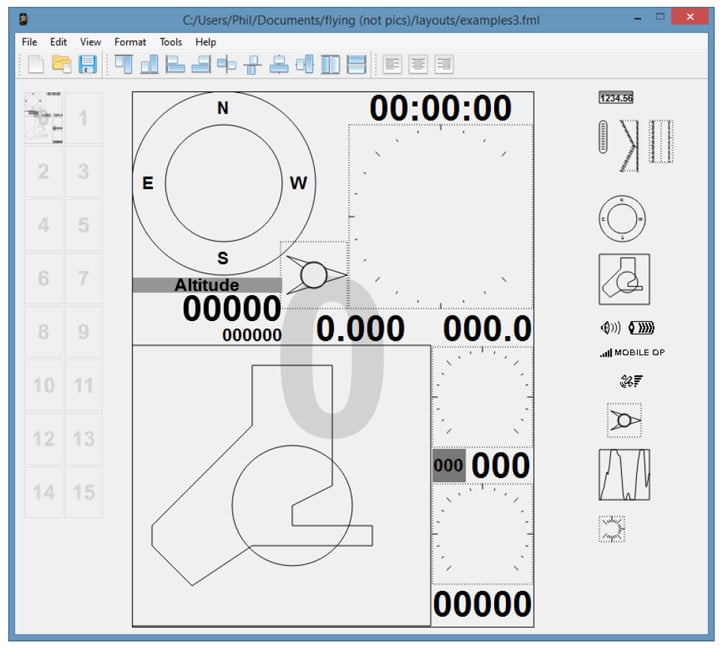
Download this layout example here (right click, save link as).
This is the most complex page that I use now, this one has the nav wheel with thermal marker and the snail trail on the task map to help me re-establish a climb if I need it. This can be useful coming back from the airspace page.
With the dials I prefer a twitchy needle and a steady number and you'll notice that almost nothing is labelled, this is to save space and allow for larger fonts. Time is at the top above the larger vario, with the average climb rate below (and I use 10 seconds as an average).
Altitude with Flight Level are on the other side (in case the airspace alarm goes off it might save me switching if I have the flight level immediately available) and the 'dist line' is in between, it has units too so again that helps make it clear what it is without the label. Speed is to the right of the map, (instant needle, average number) and the tiny font displays speed to start. Once speed to start is greater than trim speed you can head for the cylinder edge (this helps time your start efficiently).
Below the glide dial is my only UDF - I set this for GR to Goal in comps and leave it as Current Glide Ratio for normal XC flying. The dial is set so the 10 is at the top and each small marker = 1 point of glide so the range is from 1 to 19.
Find out more about the Flymaster LIVE SD
Flymaster LIVE SD insights video
Brought to you by Flybubble

Like what we do? The best way to thank and support us is to buy gear from us and recommend us to others. Review our service on Trustpilot and our products on Flybubble Shop. You can also subscribe to Flybubble Patreon. Thank you!