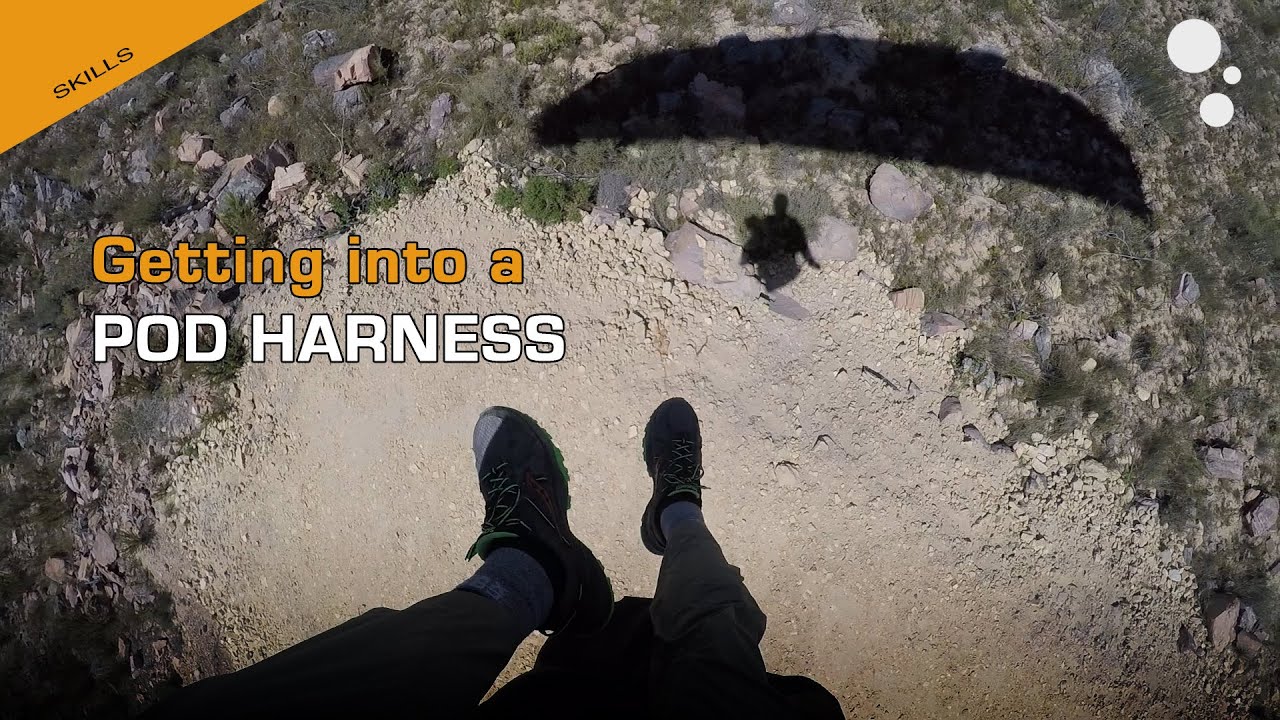
Tips on getting into a paragliding pod harness easier
With practice, getting your legs and feet into your pod harness should be quick and easy. It's no good having to struggle to get in properly every time. As well as being frustrating, struggling to get into the speedbag (leg fairing) when you launch means you're not in control at a critical time, when you're near the ground, close to other pilots and possibly in need of your speedbar. Worse, you could end up accidentally activating the paraglider speed system, possibly asymmetrically, which is highly dangerous as it could result in a wing collapse at low level.
For these reasons at least we don't recommend pod harnesses to paraglider pilots who are new, who fly irregularly or don't already very good launch and landing skills. It's wise to master the basic skills of paragliding before adding further complications. On this note, Kortel Design have written an interesting article on the pros and cons of paragliding pod harnesses, in French: Reflexion sur les Kocons.
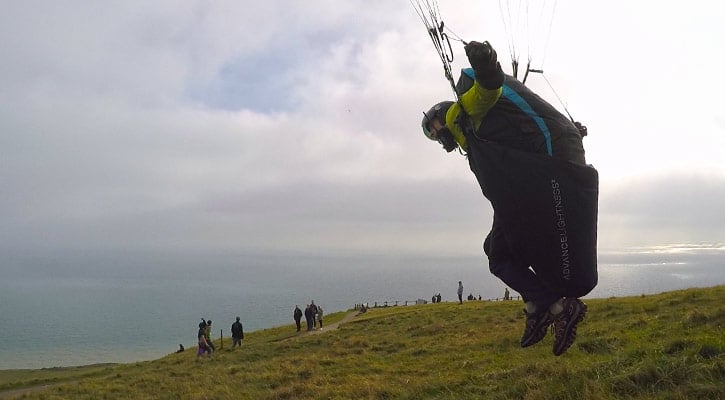
^ Carlo keeps his weight ahead of the chest strap to avoid slipping too low. His feet are already close to the end of the speedbag so getting in will be simple.
Identifying the cause
Some paraglider pilots find it hard to get into any paragliding pod harness. This could be down to a number of factors. The most common ones are:
- Poor match of harness model to pilot.
- Wrong size harness.
- Poor harness setup.
- Incorrect technique.
Let's take a look at each of these in more detail.
1. Poor match of harness model to pilot.
Harnesses all have different dimensions, giving a different fit, which may suit some pilots but not others. Harness comfort is a very personal thing, which is why we have a fitting service to ensure pilots get the right match. To be able to do this we have to keep a large range of harnesses in stock. Take three pilots of similar height, weight and build and let them try out several harnesses.
Chances are, each of them will suit a different harness best! Everyone is built differently - longer/shorter legs/thighs/body, narrower/wider hips/chest, bigger/smaller belly/feet; more/less curved back; bottom/top heavy; etc. Pilots also have different preferences.
2. Wrong size harness.
Heard on the hill: "I bought the smaller one because it was lighter and more compact to carry. I feel a like a tightly trussed chicken in it, unable to stand up straight on launch, and can't get my foot high enough to reach inside the speedbag. In the air I feel more like I sitting on it than in it. On the plus side it doesn't make my bum look as big (as the right size harness would)."
And surprisingly common: "I bought the larger one because my mate was selling his old harness at a good price. I've tightened the speedbag straps as far as they'll go, which means it's now about as aerodynamic as a Chinese Shar-Pei dog, and I still have to point my toes and wear platforms to reach the footplate. When it's choppy I feel like I'm flopping around in the harness like a rag doll. On the plus side I've now got calves of steel, the size and shape of Cantaloupe melons."
It's not just a seat - it's your connection to your wing and ultimately the air currents. If your harness fits you well you will feel a cohesion in your flying equipment that builds confidence and helps you make the most of the subtle shifts of the air.
An oversized harness increases the risk of you slipping out of the seat during launch and ending up dangling on the leg straps, unable to access the fairing. An undersized harness, particularly a short leg fairing, can make it impossible to get your feet into the pod.
3. Poor harness setup.
It takes a long time to set up a modern pod correctly, because without an external eye it's hard to judge the angle of flight. This is why it's useful to get a harness fitting session. The DHV comments "Performance gains while flying through reduced wind resistance are only possible when pod harnesses are carefully setup and aligned to the direction of travel. At a glance the advantages may appear clear, but the non-trivial setup is often ignored and results in no effective gain."
If you're setting things up at home, make sure you put all your normal flying gear in the back of the harness, as this can affect your balance and body position.
Skywalk advises "Our measurements in the Daimler Wind Tunnel showed that it is clearly better to correct pilot position so that the legs lie in a relatively high position. Then the surface of the harness is almost parallel to the approaching air."
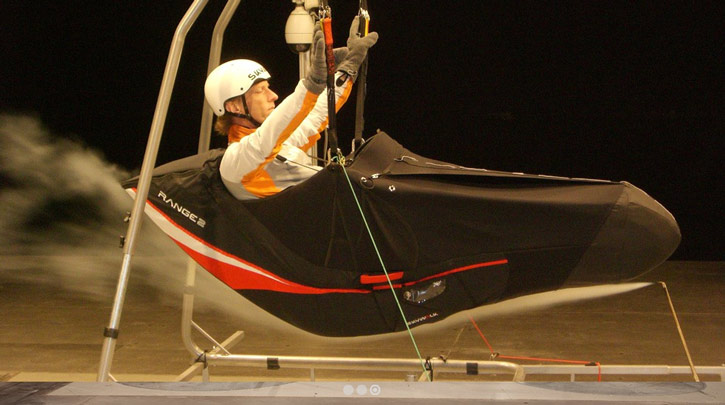
^ A Skywalk pod harness during testing in the Daimler wind tunnel.
Note that the position shown above is set relative to a horizontal (wind tunnel) airflow. Your airflow in flight comes up at your glide angle (roughly 10:1). As you accelerate, the angle steepens but you'll likely tip slightly more nose-down as you extend your feet on the speedbar.
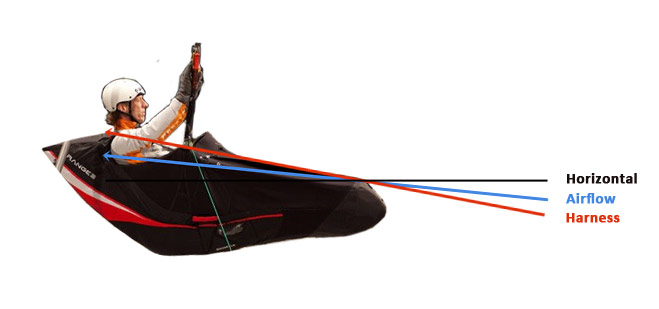
^ The ideal paragliding pod harness position.
Kortel Design goes a step further, and advises flying with a slightly nose-up attitude to reduce the significant impact of the drag created by shoulders, arms and head. The pod should shield this area slightly. The worst position is with the toes too low, exposing your upper body to the full impact of the wind. Read Kortel's interesting article, in French: Reflexion sur l'aerodynamique des sellettes.
So if you get the top surface of your fairing to align with the airflow, you'll be close to perfect. If you look over your toes, you should just be able to see the farthest landing field you can reach on glide in still air - a fun test for a winter's day.
To get your feet to rise you can loosen your lumbar and shoulder straps. You can also shorten the pod, but when it is too short it can be difficult to get into it.
4. Incorrect technique.
Even if the harness model and size are perfectly matched to the pilot, and the harness ideally set up, incorrect technique could well mean the difference between quick-and-easy speedbag entry and the comedy flying paraglider pod harness dance. Only amusing for those watching.
Let's see how it's done right in our video on how to get into a paraglider pod harness:
Methods
To summarise from the video:
Method 1: standard pod entry
Your pod skirt has a topside (the fabric overlaps the lower layer) and an underside (entry side). Extend your leg on the topside, use your leg on the underside to get in. Bring your foot against the other knee, use the back of your heel to grab the mouth of the pod at the footplate.
Method 2: for occasional problems
Take both brakes in one hand (so you still have some control of the wing and can easily grab the brakes in both hands again if necessary) to free up the other hand to take hold of the speedbag as low down as you can reach on the entry side and pull it forwards so you can get your foot in. Make sure you keep yourself on a safe course whilst you do this.
Method 3: for frequent problems
You'll need either some cord (elastic or standard) or the purpose-made Advance Speedbag Step-In Aid.
If you go for the DIY cord option, attach this to the inside of the pod on the non-entry side, near the footplate. At the free end of the cord tie a big knot and trap this in your shoe laces, on the non-entry side.
The Advance Speedbag Step-In Aid has a loop stitched in at one end, making it easy to attach, and a movable knot at the other end, for easy adjustment and trapping in your shoe laces.
Now when you launch you can extend the non-entry foot to extend the pod, making it easier to put the other foot into the pod. It will take some fine-tuning to get the length of the cord right.
Shoes or boots?
Some pilots find it easier to get into the speedbag with trainers on, rather than boots which tend to be bulkier. However you should be able to get into a speedbag with either, and purpose-built freeflying boots like the Hanwag Sky GTX can save your ankles in the event of a hard landing on uneven terrain.
Still can't get in?
This may be due to a lack of physical flexibility, inconvenient bodily proportions, or a combination of factors. Ideally, we recommend getting a professional harness fitting session before or when changing harnesses. If you'd like help choosing a new freeflight harness, and getting your paragliding harness set up for optimum performance, consider buying your gear from Flybubble - our customers get this service for free, as part of the deal.
See our range of Pod Paragliding Harnesses
Brought to you by Flybubble

Like what we do? The best way to thank and support us is to buy gear from us and recommend us to others. Review our service on Trustpilot and our products on Flybubble Shop. You can also subscribe to Flybubble Patreon. Thank you!