Do you feel the need for speed? Perhaps you should. Or maybe you ought to rein it in a little?
Speed to fly is all about applying the appropriate speed to achieve your flying objective in the current conditions. In this article we'll take you through the general principles so you can make a clear and simple choice.
The fundamentals
Your glide performance is determined by the ratio of lift to drag.
At trim speed (usually set at your best gliding speed) the lift your paraglider produces is roughly nine times greater than the drag of you and your wing (Progression Class, mid EN B). As you can’t improve the shape of the wing without buying a higher performance model, the only way to improve your glide is to reduce your drag, which is usually minimised at hands up ‘best glide’ trim speed (with sleek clothing, arms tucked behind risers, sitting in an aerodynamic pod harness and humming ‘on the wings of an eagle’).
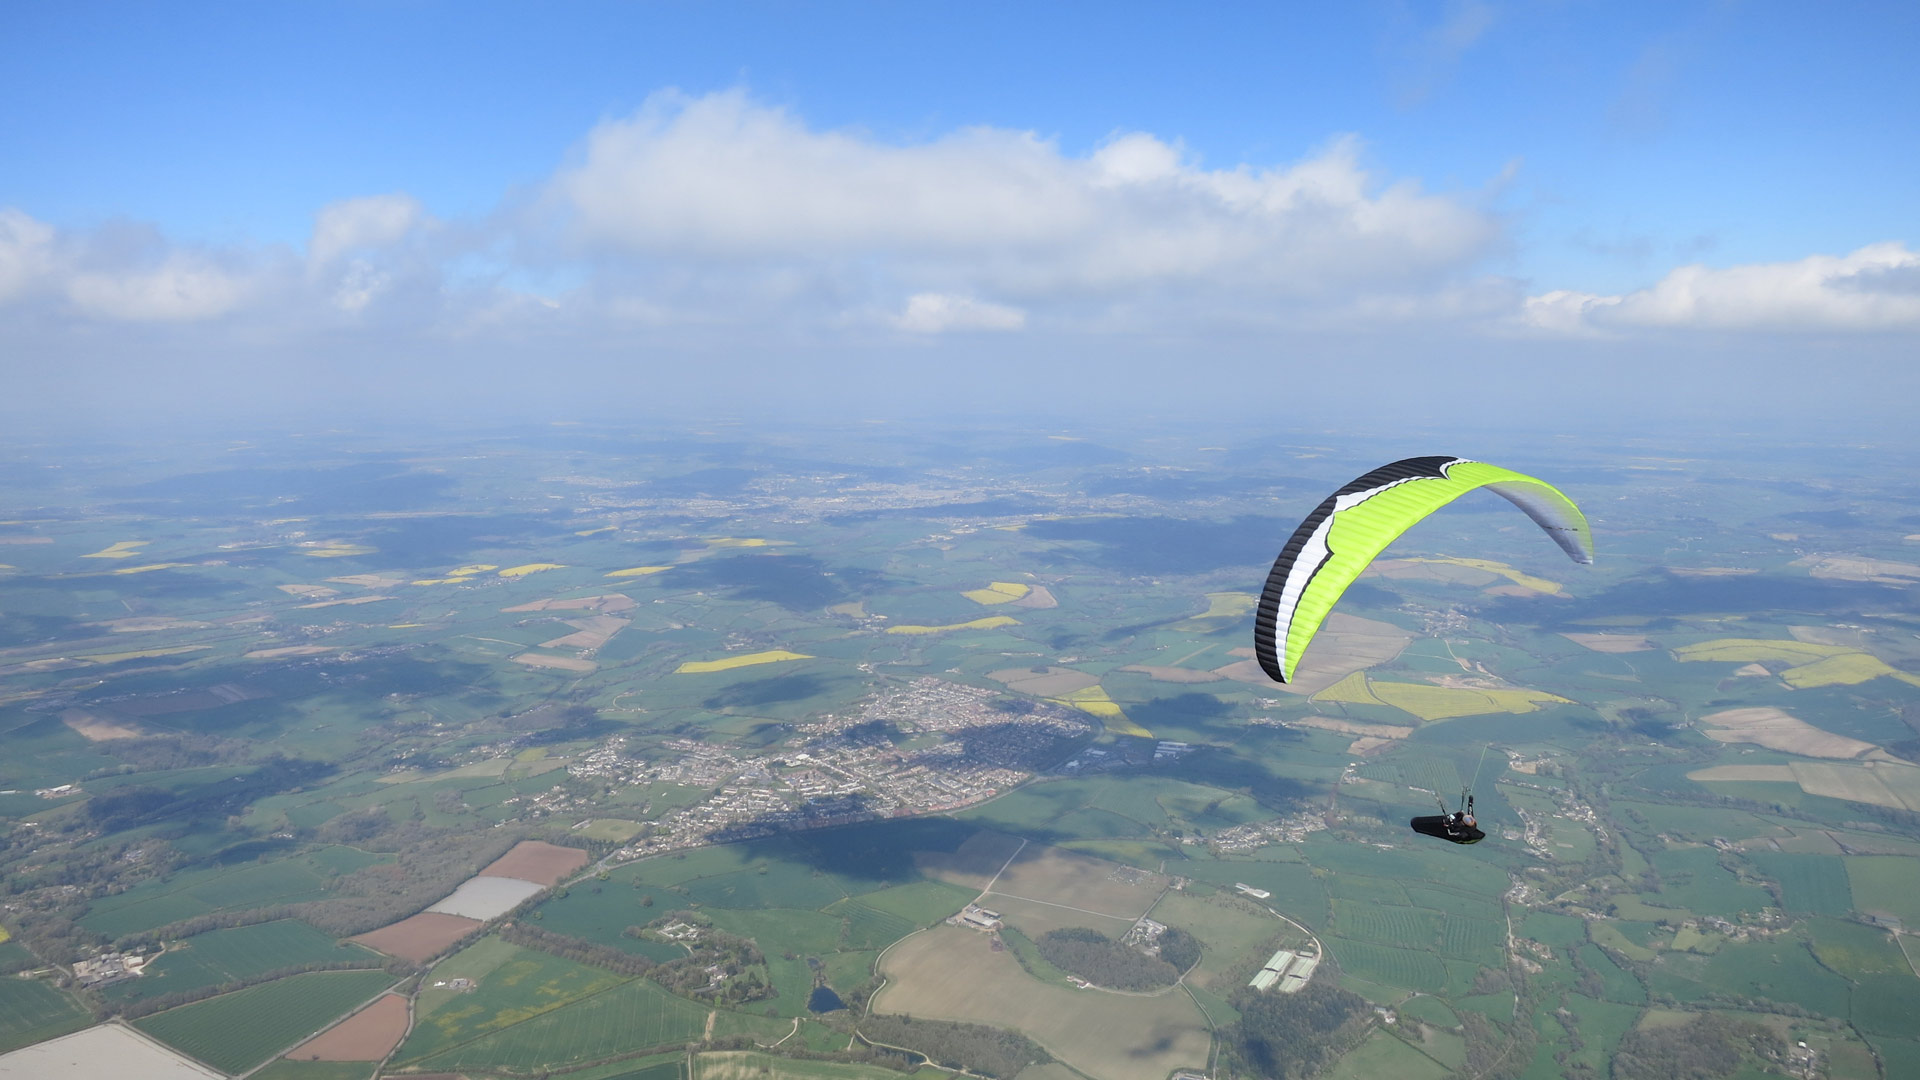
That’s assuming that the air is still. Once the air starts moving, other factors come into play: lift, sink, head and tail-winds all affect your resultant glide ratio over the ground. Could there be a better speed to fly at to maximise your glide, rather than just ‘hands up’?
Performance data
Measuring glide angles and polar curves is notoriously complicated, but if we assume some rough performance figures we can develop some rules that are good enough to be practical. Building on the experience of Cross Country magazine we can see that speeds are lower than you might expect. This is indicated airspeed, calibrated to sea level. This is not scaled for gliding calculations (you’re not going anywhere from 0 metres up) so we have adjusted the speeds to 1000m altitude using Jerome’s handy airspeed converter, and assumed an average summertime air temperature of 15 degrees at that altitude. This will more closely match what you are experiencing when trying to optimise your glide.
|
Wing class |
Trim (km/h) |
Top (km/h) |
Glide trim |
Glide (top speed) |
Sink rate (trim) |
Sink rate (top speed) |
|
Progression (EN B) |
36 |
48 |
9 |
7 |
1.11 |
1.90 |
|
XC (EN B+) |
36 |
50 |
9.5 |
7.5 |
1.05 |
1.85 |
|
Performance (EN C) |
37 |
53 |
10 |
8 |
1.03 |
1.84 |
|
Advanced (EN D) |
37 |
56 |
10.5 |
8.5 |
0.98 |
1.83 |
|
Competition (CCC) |
37 |
62 |
11 |
9 |
0.93 |
1.91 |
For glide angles we have made an estimation of the current models available. Real life experience suggests that the max glide (trim speed, still air) of different classes of wing is lower and more closely grouped than these general figures due to turbulence, and the pitch and roll energy of higher class wings which requires management and thus reduces the best glide.
Safety
If this is your first experiment with accelerating your paraglider, do so with good height clearance in smooth conditions. It's no good mashing the bar and then picking the laundry out of the trees, you need height to deal with anything that doesn't fit with the plan. Applying lots of bar, low over the ground, in strong wind is a bad idea. Be mindful of others around you, especially below and behind.
Take care! Spanwise there is a line of max tension that moves with your angle of attack. This change in tension can lead to a glider feeling more solid 'at speed' but in fact it is still closer to blowing out because of the reduced angle of attack to the airflow.
PRINCIPLE 1: into wind, speed up
Taken to the most extreme example, when wind speed equals trim speed you are simply hovering over the hill. In this scenario increasing your speed obviously improves your glide over the ground. You will start moving forward and cover more ground. You will however sink quicker and arrive at the ground sooner, but at least this is in front of the hill, not behind.
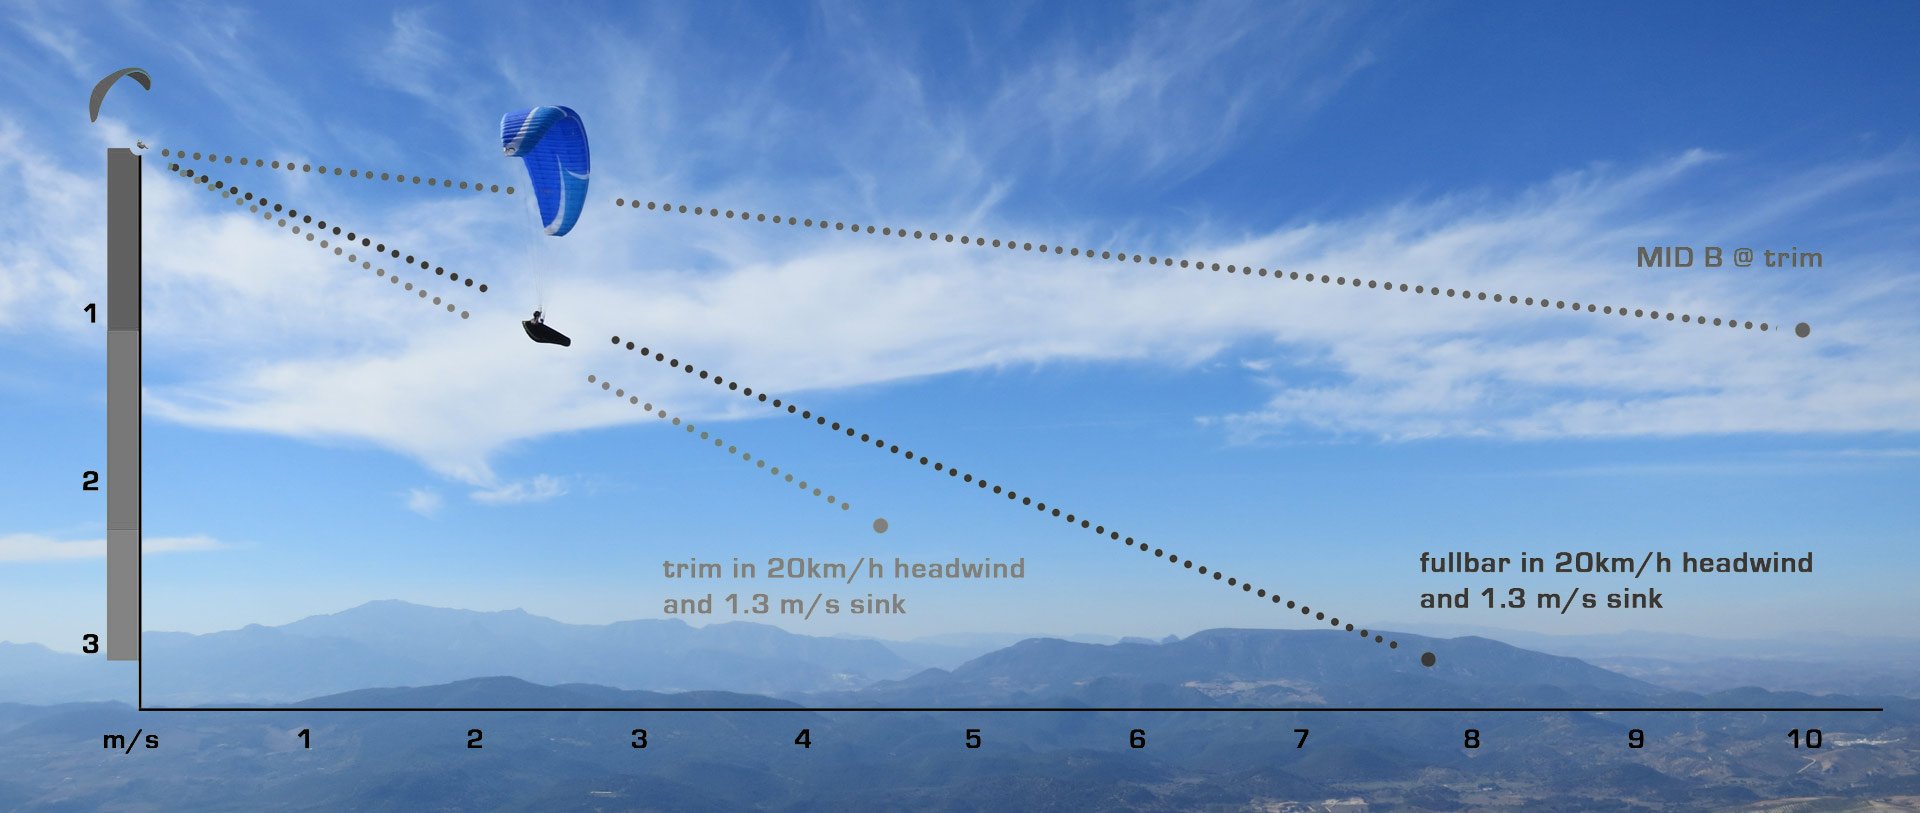
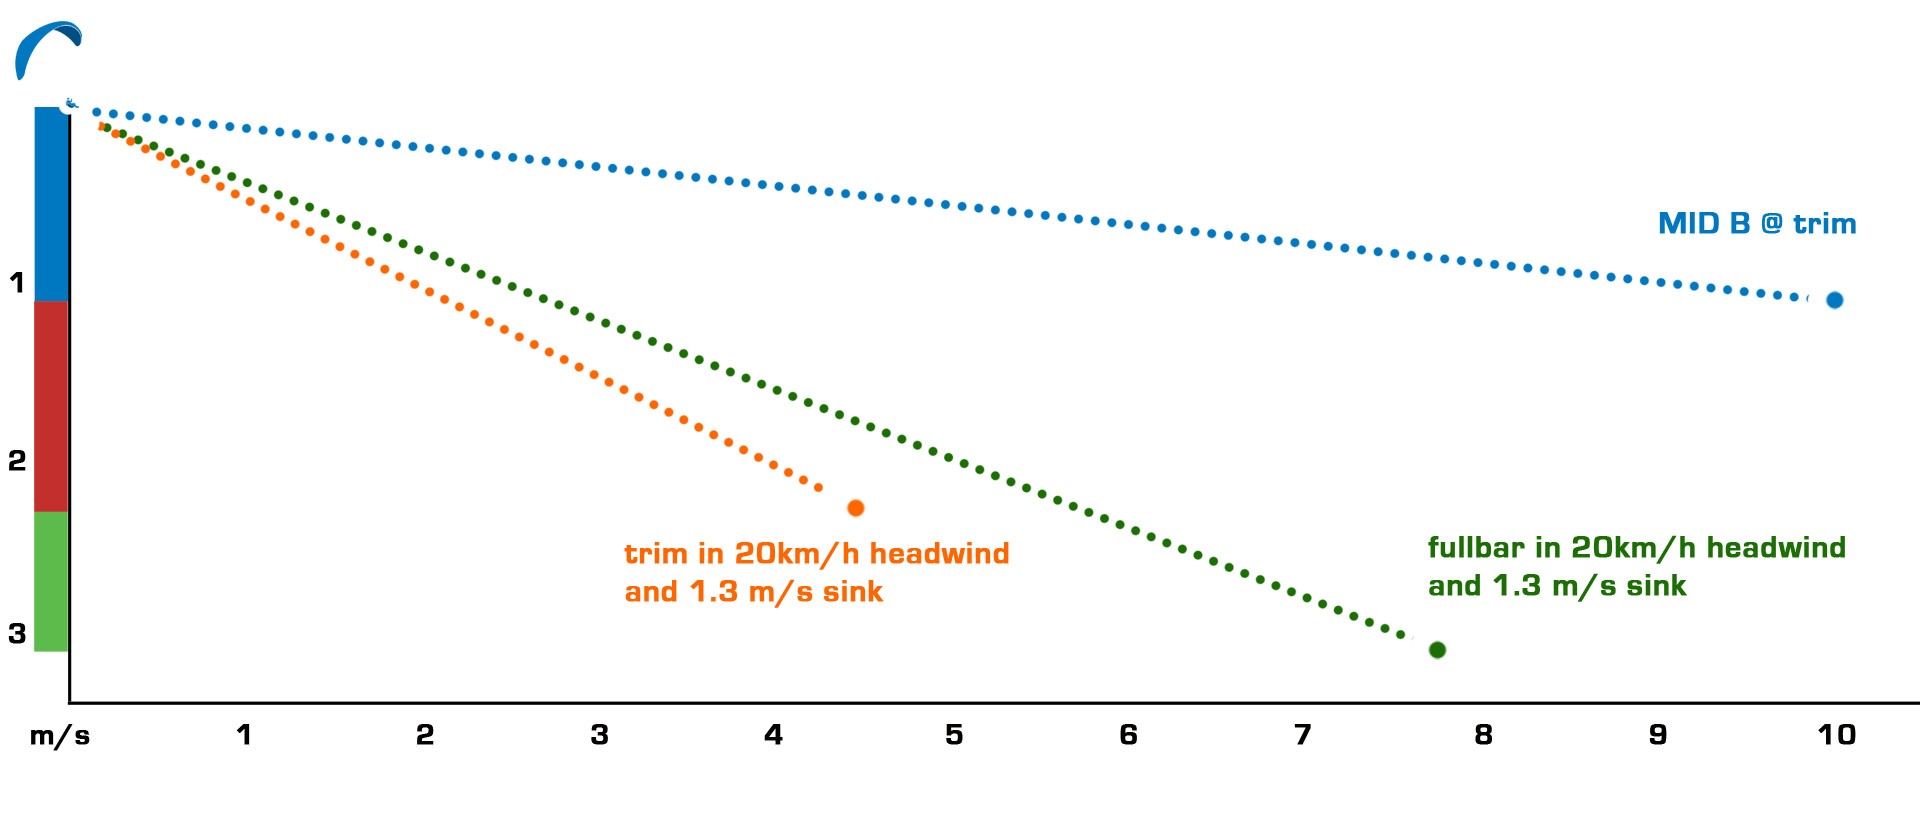
Taking a more 'natural' example and some rough assumptions about a modern Progression Class paraglider (mid EN B): let's use a typical soaring day, where the wind speed is probably close to 20km/h. Into wind (and out of lift) your glide will be reduced, because the wind pushes you back more than half of the ground you gain. You get a dismal 4:1 glide to the yellow dot.

By using your speedbar you’d accelerate up to 12 km/h but this causes more sink. There’s a penalty that gets worse the more you accelerate. Assuming that in still air your glide would degrade from 9 down to 7, with this headwind you can see that by flying faster we have not improved the glide (green line). You could eke out slightly more glide by getting the perfect bar position somewhere in between (half bar).
Set a threshold: when the headwind is 20 km/h you have freedom of choice, or put another way, when your GPS reads 16 km/h. If you need speed to reach a thermal you can see, you can use full bar with no penalty. If you would prefer to retain maximum collapse resistance, comfort and the ability to feel out lift lines, you can stay at trim speed. If you’ve got a long transition, the first step of speedbar (half bar) could help a little.
There’s little need for the speedbar when the headwind is less than 20 km/h, it will most likely degrade your glide. But from this point onwards, speedbar is essential. When the wind is really strong (30 km/h) you gain a noticeable advantage on bar.

On a Performance class wing, accelerating is more effective. The threshold reduces to 15 km/h headwind.
PRINCIPLE 2: in sink, speed up
In sinking air, the more time you spend in it, the more likely you are to meet the ground. How you respond can also depend on what kind of sinking air you are in. What’s causing the sink?
If you are low you should really only focus on your glider handling skills and the danger zones where wind is coming over terrain. The sink might be caused by a nearby thermal trigger zone, so look out for visual clues for lift: birds, debris, dusties, smells, etc.
If you are high and decide to cross an expected area of sink then you must plan ahead for new situations, don’t wait until you’re in the midst of a situation to make a choice. This isn’t just about preparing to deal with a collapse but also where you aim for arriving on the next ridge or reaching a certain altitude, at what point will you back off the bar and focus on a low save, which is your best looking trigger, etc.
Assuming we’re back on that Progression class wing again, air that is sinking at 1.3 m/s will cause your vario to read -2.4 m/s at trim speed. This reduces your glide to 4.2. Speeding up to full bar yields a glide of 4.2. It’s the same glide path, just faster.

So the threshold is -1.3 m/s sink. You get the roughly the same glide at trim or full speed, and only slightly better with half bar, so choose what suits your situation. As the sink strengthens use more bar from this point on. It makes sense to set your vario sink threshold to -2.4 m/s so you get an alert.
On a Performance class wing, accelerating has less of a sink rate penalty. The threshold reduces to 0.7 m/s sink (your vario reads -1.7 m/s). This is why so many top guns fly at full bar, because they are able to move faster through the mild sink of most transitions with no glide penalty.
PRINCIPLE 3: with a tailwind, glide at trim
This is the most common XC condition, as most pilots try to go as far as possible, downwind. If there’s no sink, only tailwind, speeding up worsens your glide. With a 20 km/h tailwind you can increase your sink threshold to -3.7 m/s on your vario (sink of-2.6 m/s) before you reach the point where there’s no penalty for going to full bar.
PRINCIPLE 4: sink and headwind? Speed up sooner.
Occasionally, you need to glide upwind, and now both effects are combined. This is especially relevant at the start of your flight, when you’re near the hill, trying to push upwind to find better climbs releasing in front of the hill.
For example, when the headwind is 10 km/h and the sink is 0.7 m/s (your GPS reads 26 km/h and vario reads -1.8 m/s) we’re at the action point already, free to use trim, half bar or full bar without much difference. Most days will have some wind near the hill, most glides will have a little sink, so most often you’ll need half bar or more to get the best glide here.
For Performance Class wings, headwind of 8 km/h and sink of only 0.3 m/s will be enough to justify half or even full bar.
Adding two half way points (20 km/h headwind, 1.3 m/s sink) which is a fairly standard ‘sink, headwind’ mix, gets you firmly into full speedbar territory. Glide at trim is a dismal 1.9, glide at full bar is a majestic 2.4!
This is when you might notice the advantage of an EN D wing: accelerated glide of 3.2. No, it still flies like a dead turkey.
PRINCIPLE 5 - SPEED TO FLY
MacCready was one of a number of sailplane pilots who looked at the problem of how to fly efficiently through an airmass. MacCready’s ring is an indicator that tells pilots what speed to fly for a given lifting or sinking region of air. Broadly speaking we should aim to slow down in lift and speed up in the sink but MacCready’s twist was to fly faster because of the anticipated next climb. The theory works because if you get there sooner you start climbing quicker and when your competitor finally arrives you’ve now climbed higher than them.
|
Pilot |
Starting altitude |
Speed |
Time to cross 1km in seconds |
Sink rate in m/s |
Height loss (m) |
Height gained in 5m/s |
Finishing altitude |
|
A |
1000 |
36 |
100 |
1.25 |
125 |
0 |
875 |
|
B |
1000 |
48 |
75 |
2.05 |
154 |
+125 |
971 |
The still air glide at full speed initially looks worse, but we can gain 125 m by being there sooner and climbing for longer. The faster pilot gets the climb first and is now ahead.

The danger with this is that if we add speed in order to fly into the headwind and then add some more to fly through the sink and then more for the next climb ahead then we can race ourselves into the ground at full speed if the thermal isn’t within reach, or we miss it.
What is needed is a balance. Know when to slow down, know when to back off, like turning out of the sink to find a lifty line. The best pilots will use a more subtle approach to get the best out of their wings rather than just blindly mashing the bar.
Every glide has its own unique challenges. Analyse the situation ahead. Are you sure you’ll find another thermal? It might be best to turn around and float upwind or hang on to a zero for a while.
Speed to fly theory also only works if you core and climb straight away. The slower pilot is only a few seconds behind you and can often fly straight to the best part of the thermal (which is why lower class wings are often able to pimp off pilots on ‘high performers’).
Climbing better often gives you more advantage than gliding quickly but it all depends how long you spend on each aspect of your flight. When you review your flights you’ll see if you spend more time on one or the other and that’s where to apply your focus.
If you are consistently flying long distances, and you are looking to maximise the distance in a day, then you should fly a little faster than ‘best glide’. The simplest way to do so is to reduce the suggested thresholds (headwind, sink) according to your confidence about the strong thermal ahead.
PRINCIPLE 6 – develop your style
There is a physical limit to how long you can hold the bar on for. It takes focus and concentration so it can be mentally draining. Most glides are only a few minutes unless you have lots of altitude and a very definite source to aim at. The benefits of using your speedbar are small unless the sink and wind are extreme, so don’t fret too much about the exact position, focus more on where you are flying. If it’s getting rough or you’re getting low, back off!
It’s good to have some rules to help you make decisions so that in certain circumstances you don’t think or try to do the sums, you just commit to doing what you’d planned already. Some gliders help with this, Advance for example, have the speed-to-fly gauge on the risers so that for such a sink rate or such a head wind there is a specific optimal speed marked up. Some instruments will give you a suggested speed to fly, which becomes more relevant when combined with an airspeed indicator.
Many instruments will display your current Glide Ratio over the ground, which you can try to optimise by varying the speed, but it’s hard to be accurate as the air currents are constantly changing (as does the glide ratio).
Try to establish your own guidelines that you find comfortable and that match your wing.
Copyright Flybubble
Brought to you by Flybubble
Like what we do? The best way to thank and support us is to buy gear from us and recommend us to others. Review our service on Trustpilot and our products on Flybubble Shop. You can also subscribe to Flybubble Patreon. Thank you!

