


Catching the Drift: Thermals and Wind
- by Shopify API

Holding on to a drifting thermal can be very challenging, but improving this skill can yield exponential gains in airtime.
Thermals form above ground sources which have heated more than surrounding terrain. This is probably so for a few hours, so thermals will release from the same area over and over. Due to their buoyancy, thermals want to rise straight up. The bigger the thermal pulse (continuous flow of warm air feeding into the column) the more inertia it has, so it can resist the influence of the wind for longer, continuing in the direction it has already started moving in. This is especially noticeable near the ground where it retains the velocity of its track (uphill to its trigger point) which can often be different to the prevailing wind.
At some point the prevailing wind will overcome this inertia and tilt the thermal column.

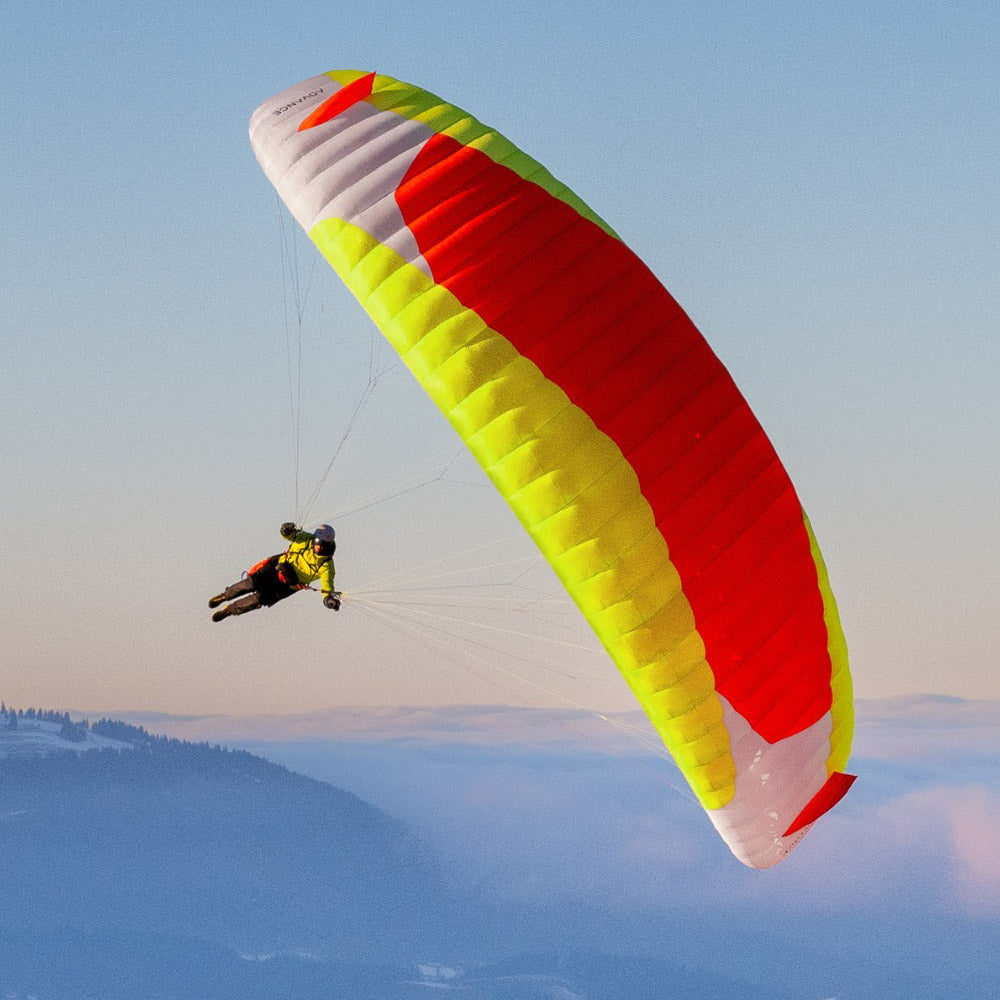
Antoine Girard returning after a little bit of adventuring to Broad Peak. The significant slab of rock provides a thermal with strong inertia, but the wind at altitude eventually tips it over.
Depending on the temperature difference to the air they rise through, thermals will accelerate (and begin to rise more vertically) or decelerate (and start drifting more). The winds at different altitudes can vary in direction and strength too. The thermals therefore follow a wandering tilted trajectory as they rise, which can be difficult to map in three dimensions.

The principles of thermal drift apply everywhere. By establishing the pattern for the day you can estimate where the next climb curtain will lead from the next likely ground source.
Catching the core
Because the soaring pilot is always sinking relative to the airflow within the thermal it's not good enough to just go around and around in a circle. You would only stay centred if the core was a steady flow of warm air, but it usually consists of gusts, eddies and multiple cores. The centre of strongest lift moves, so constant adjustments are needed to stay 'in the core'. If you respond to these lumps and bumps you can avoid falling out of the thermal.
When you encounter stronger lift, it will try to tip you out. It resists your turn, and it will often tip your wing back (nose up). The trick is to react fast and shift your weight into the lift while timing your brake input to coincide with when your wing moves forwards again, to produce a tight turn that captures the maximum energy possible.
Once you have established a 360 degree turn, widen or tighten your circle to shift it towards the stronger lift and away from any sink until your average climb is maximised.
Searching for more
Although it's tempting to just hang on to your newly found 'perfect circle', it's important to continue the search, because you might be in a side branch of a more powerful current. Every five or so turns, elongate your circle in a new heading (while continuing the turn direction). There's little risk of losing the thermal this way because you can easily return to where you were, but it helps you build a mental image of what's going on around 'your' core.

This diagram indicates the track a pilot should take relative to his perceived position within the thermal airmass. The ground track will look very different, depending on the drift.
Chasing the core
The strongest lift is often concentrated towards the upwind edge of the thermal. This is noticeable when the wind or lapse rate is increasing with altitude or when nearing cloudbase. It's more obvious with stronger wind.
In these conditions, elongate the turn towards the upwind side occasionally, where you'll find the sharp spike in lift. If you go slightly too far, you'll experience a sharp dropoff, after exiting the upwind side.

In windy conditions, regular small adjustments are often needed to stay in the strong lift towards the upwind side of the thermal. Whenever the track loops are bunched up more (right), the pilot has adjusted ‘upwind’ slightly.
Losing the core
If you lost the thermal with a feeling of being spat out of the lift, it's probably downwind of you. If you lost it because it became scrappy and gradually weaker, it's likely to be upwind of you (or something more useful will be). Maybe, the thermal has just died a natural death by running out of buoyancy, in which case the air is fairly smooth and it's time to glide on.
Finding the next drifting thermal using the climb curtain
Stronger cores rise more vertically, weaker cores will rise at a shallower angle. If we mapped the potential lift, it would form a climb curtain, like a pennant linking the ground source at an angle to the top of the strongest climb (possibly capped by a cloud).

The thermal source is unlikely to produce a continuous current, it's more likely to offer regular pulses with pauses in between, which will leave holes throughout the curtain.
These curtains will all align with the wind, and be straightest at their leading edge, but will billow towards the downwind side according to the wind (which affects weaker climbs more). The roughly triangular shape assumes a moderate and steady lapse rate. The more unstable or varied the lapse, the more wavy the trailing edge.
This model suggests a strategy for finding climbs - aim slightly downwind of the line you'd expect the strongest climb to take from the source, fly crosswind through the curtain and when you pass through any hint of lift, turn into wind to follow the curtain to its upwind edge. This increases your chances of intersecting multiple climbs of increasing strength. You should take any decent climb you find, and fly upwind when you lose it, until the point where you think you have progressed upwind of the climb curtain altogether.
Drift down low
Thermal drift is difficult to track near the ground, as thermals will be initially pulled towards low pressure areas behind obstacles and along lines of warmer or higher terrain. The stronger the wind the more critical it becomes, as the heated layer is stripped off the surface, making climbs short-lived, more turbulent, and more dominated by the prevailing (strong) wind.
Using any scrap of lift (even a 'zero' on your vario) and drifting downwind is often the best way to find a low save, because this offers you the opportunity to pass over more ground sources and triggers. If you lose the scrap, it's worth searching downwind again as one thermal releasing can trigger the next in a chain, causing the best lift to move faster than the prevailing wind.

Low save survival technique: drifting in a zero to reach the next trigger point where the warm reservoir of the fields meets the cooler grass and lakes. It only really kicks off once I reach the town.
However, you have to be careful because the wind is often accelerated by ground features, especially near the top of a hill. Although obstacles that help you to soar will usually trigger thermals, try to move upwind of these regions as much as possible and towards large sheltered areas of potential heating to pick of thermals with improved trajectory.
Watch your ground speed: if it increases while going upwind, there's probably a thermal ahead of you. All thermals block the prevailing wind to some degree, allowing pilots to sense the subtle 'draw' when approaching from the lee side.
Case study: thermal drift
Let's put these concepts into practice in a flight. Our objective is to find something strong enough to climb away.
The first thermal has acquired a lot of drift. It was not large enough to leave the ground on its own, so it has been rolled onto the slope and accelerated by the venturi effect close to the top of the hill. This makes it hard to use, and it has a narrow peak of lift that needs a steep bank angle to hold onto, which causes too much sink on the downwind side, where the lift is weaker. Although it might be possible to drift with this grotty climb to the tree line trigger, it is highly likely I'll lose this core as it's just too hard to track. Being pushed low over the trees where the venturi will be at its worst is also risky.
So I try to find a line to move upwind along. Feeling the movements of my wing using just the weight transfer in my harness helps to keep the speed high and gain ground.
A thermal that releases out here has not yet been influenced by the venturi over the ridge, and it has established a better trajectory. It has more inertia because it is strong enough to release without the aid of the ridge slope. Only the weaker rubbish will be pushed onto the ridge.
I use the first turn to gain some more ground into wind, and to feel out the upwind edge, turning the instant I feel the lift weakening. After a few adjustments to the 360 I settle in and follow the drift NNE.
After 5 turns it's time to explore a bit, so I loop over towards the side of stronger lift, and loop again further on the next turn - there might be something better coming off the 'nose' of the ridge?
The wind increases and shifts so I begin to drift faster towards the ENE. After four turns the wind settles into a steady SW (drifting me NE). I'm not reacting to the drift, it's just useful to observe - I'm reacting to the feeling of where the core is, and trying to follow that.
Keeping the turns really steady helps to map the changes in lift. I use a steadying 'pushing' hand on the outside riser in weak conditions, but wouldn't do so in active air or on all wings. This harness is particularly 'wallowy' with no seat board, I'm filming so I have to stabilise the camera movements, and this wing does not respond to outside brake control.
This climb takes me up to base, where I'll be able to use the enthusiastic clouds for more reliable lift. But if I drop out, I now know the drift pattern, so I can apply it to the next thermal source to visualize the climb curtain and come into the lift on the best line.
For more thermaling tips, check out the XC SECRETS section of the Knowledge Base.
- Posted in:
- XC Secrets


