In this article and accompanying video we demonstrate and discuss how to catch thermals and control your thermaling turn focusing on four key concepts: thermal searching, using weightshift, tightening on the core and optimising brake input. Using the correct timing, weightshift and outer brake inputs can dramatically improve your climb rate and get you to the top of the stack.
Catching thermals with both hands video
The instructions in the following video assume you're flying in thermic air, so you're searching for lifting currents in an unstable airmass, not soaring. Four key concepts are demonstrated here: searching for thermals, weightshift turns, tightening on strong lift and using outside brake.
Watch the Flybubble Paragliding video, Paraglider Control: Catching Thermals With Both Hands:
Searching for thermals
In the video, you can see the pilot using a little brake to ‘feel' the glider. This isn't the only way to feel what's going on in the air, but the brakes provide the simplest, most obvious line of feedback.
Within the ‘control range' of 10-50% brake, when the brakes are soft in hand, it's usually due to sinking air, low airspeed or high angle of attack. When the brakes have increased resistance, you're in lift or you've hit a sudden gust.
So the pilot is using this information to ‘sniff out' a line of lift. He begins a turn to the right, finds the brake pressure becoming very weak, so he weightshifts and turns away immediately to get back to lift line.
Keeping a little tension on the brakes is not the same as ‘hanging the weight of your hands on your brakes'. Doing the latter will result in you pulling more towards the sinking air, and pulling more brake in sink and less in lift (the wrong way around).
It's a subtle difference. Some brake input is good – just enough to do active flying inputs, to stop the wing diving ahead of you and so limiting the risk of a collapse.
As mentioned before, your brakes are not your only tool to feel out the lift. Your risers will give you a lot of information, but it takes a long time before you develop the sensitivity to their movements, or rather, until you have attention spare to integrate their feedback.
You're capable of doing it right now, even if you're a beginner. Let me put it this way. If you were sitting in the dark, and I told you that I'd tied two hungry Rottweilers to your belt with 10m lengths of Kevlar line, I know you'd be able to tell me which dog moved. You'd be able to tell me which way it was walking, and if it was about to leap towards you in the dark.
There's nothing else suspending you in the air, apart from those two riser sets. So if you start thinking about what they are telling you, you'll sense the lift and sink and shifty air currents right away. Lean on the stronger riser.
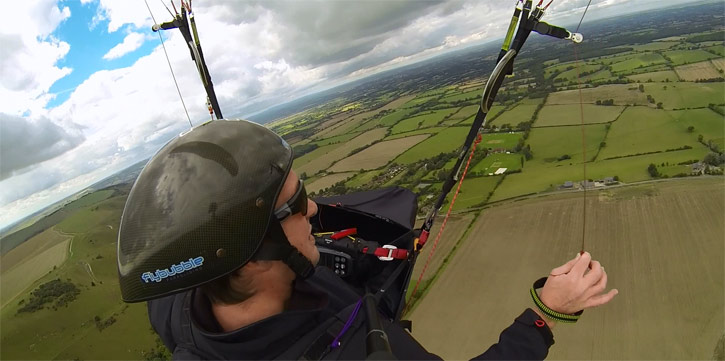
^ The pilot feels the brake go slack during the turn to the right … so goes left instead
Turning and weight-shift
As you pull brake, you increase the angle of attack of the wing and it generates slightly more lift, lifting that side of the wing and rolling your body away from the turn. On high-performance wings this is especially noticeable. It can actually tip you towards the ridge as you turn away from it.
In the video it takes 10 seconds to complete a half turn just using the brake on its own, with the pilot being a bit of a muppet and not helping with weightshift.
In the second turn, the pilot first speeds the wing up, then weight-shifts, and about 3 seconds later, turns. The weightshift doesn't really turn the glider, it just banks it, but this makes the brake input so much more effective. You'll find this makes all the difference when trying to hook into a strong thermal core.
You can weightshift as soon as you encounter the lift. There's no danger of stalling, it's the brake you've got to be careful with. After 3 seconds your wing will have adjusted to the new airflow, and you can crank that brake in.
Which way to turn?
If you can feel the one riser lift, then your habit of leaning onto the high side (see Active Flying) will mean you're already turning the correct way. If you can't sense which way to go, it doesn't matter … but a tight turn really does matter then, because you've probably flown right into the centre of the lift.
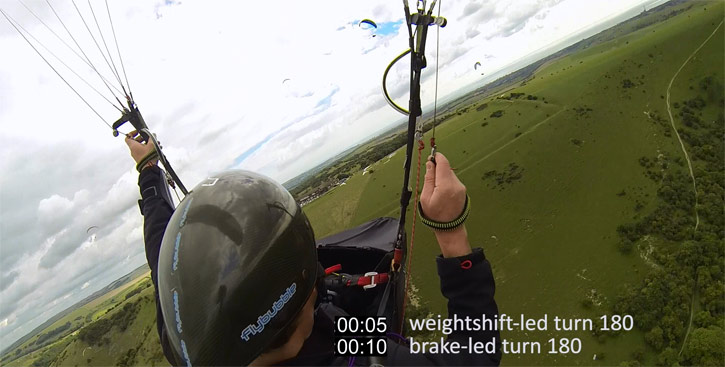
^ The weight-shift led turn is faster, so keeps you in the narrower thermal cores
Tightening on the strongest lift
Whenever you feel strong lift, lean into it straight away. You can use all your weightshift. A few seconds later you can put in the brake. This will give you a tight turn in the lift. It also means you don't waste time committing to a 360 into a ‘ghost' thermal which vanishes as soon as you begin turning. It's very easy to reverse a weight-shift turn, but once you've pulled the brake the wing will rotate and it's usually too late.
As you circle around in the thermal, try to tighten your turn whenever you feel the strong lift. There's always a delay in your response, and a delay in the wing reacting, so by the time it's going round you're likely to be almost out of the ‘sweet spot' already. As the lift gets weak and disorganised, it's best to widen your turn to search further upwind for the core.
Using outside brake
Once you've got your tight banked turn going, you usually need a small amount (10-20%) of outer brake, to calm the turn down occasionally, or to prevent collapses. Because most of your body weight is loading the inside wing, the outside wing is prone to collapses, just like a wing flown below the weight range. Also, the outside wing is most likely to encounter the rough edge of the thermal, or even worse, the sinking air beyond the thermal. Then it will really want to collapse. So pulling a little bit of brake helps to increase the angle of attack and prevent collapses. It gives you some contact with the outer wing, because you'll have very little feeling through the outer riser in this configuration.
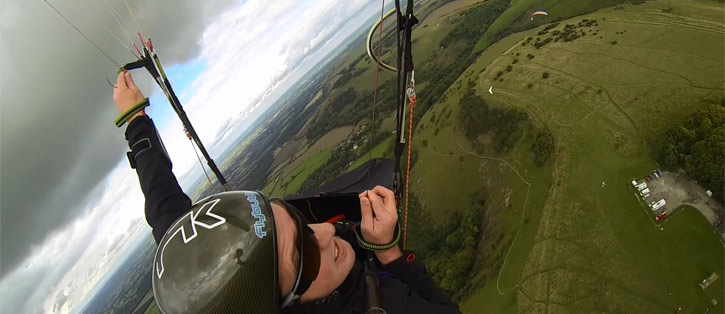
^ The pilot has just released outer brake (left) which will give him an accelerated turn to the right.
Finally, by flying with some outer brake on, you build up some tension in the wing, which can be used to boost you around a quick 90 degree corner when you need it. This is most useful when you have a thermal where only ¾ of the circle is in lift, and part is in sink. As you reach the sinking part you can release the outer brake which will speed the turn, then you reengage the outer brake to slow the turn in the lift, shifting your circle away from the sinking air.
Brought to you by Flybubble

Love what we do? There's no better way to support our efforts than buying gear from us. We'll ensure you get great service! Choose from our great range AND enable us to do more to benefit the freeflight community.